Scanning documents with an iPhone is a simple process that can save time and improve organization. The camera on an iPhone is powerful enough to produce high-quality scans that rival those from professional scanners. Users need to prepare their iPhone by ensuring the device’s camera is ready and the environment is conducive to capture a clear image.
Executing a scan on the iPhone involves a few straightforward steps that take advantage of the phone’s built-in features. The Notes app, for example, has a scanning function embedded within it, which uses the camera to digitize documents. The process is intuitive, allowing for quick adjustments to the scan before it is saved or shared.
Your iPhone is more than a camera; it’s a portable scanner. Start organizing your life and say goodbye to paper clutter with this handy feature.
Before scanning documents with your iPhone, ensure the device is ready for the task. This involves accessing the camera through the Notes app and setting it up correctly.
To begin, unlock your iPhone and open the Notes app. This app comes pre-installed with iOS, so there’s no need for additional downloads. Once the app is open, locate and tap the camera icon. This action will enable your iPhone to use its camera specifically for scanning purposes.
Within the Notes app, start a new note by tapping the icon to create one. The new note serves as the storage location for scanned documents, which are easily retrievable and can be synced across devices if iCloud is enabled. Make sure the Notes app settings are optimized to your preference by checking the Settings menu on your iPhone.
Place your document on a flat surface with good lighting. The camera’s viewfinder should fully display the document. Proper lighting ensures the camera can accurately capture the document. Adjust so that shadows and glare do not cover the text.
Your iPhone will likely be in Auto mode. It automatically scans documents when they are in focus. If necessary, switch to manual mode by tapping the shutter button. iPhone offers color options for scans, such as black and white or color mode, choose the one that fits your document best.
Scanning on an iPhone is straightforward, involving the camera and a few simple steps to capture documents.
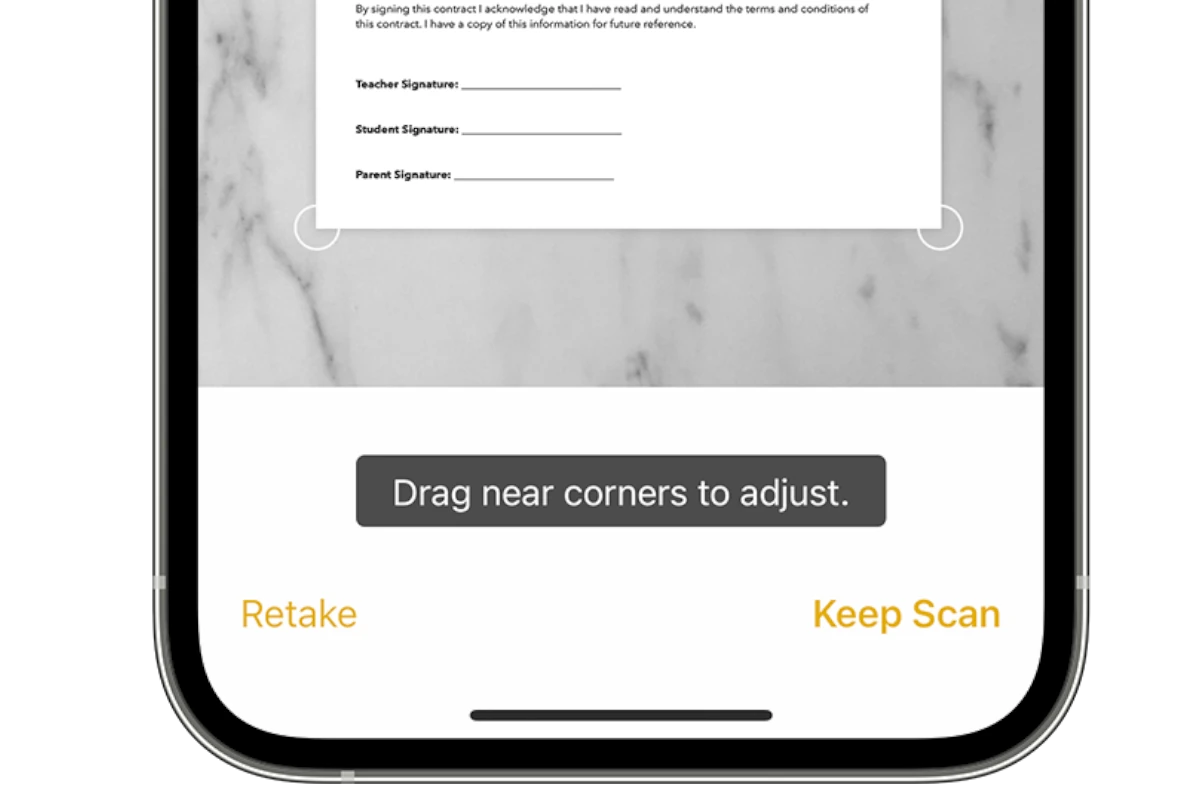
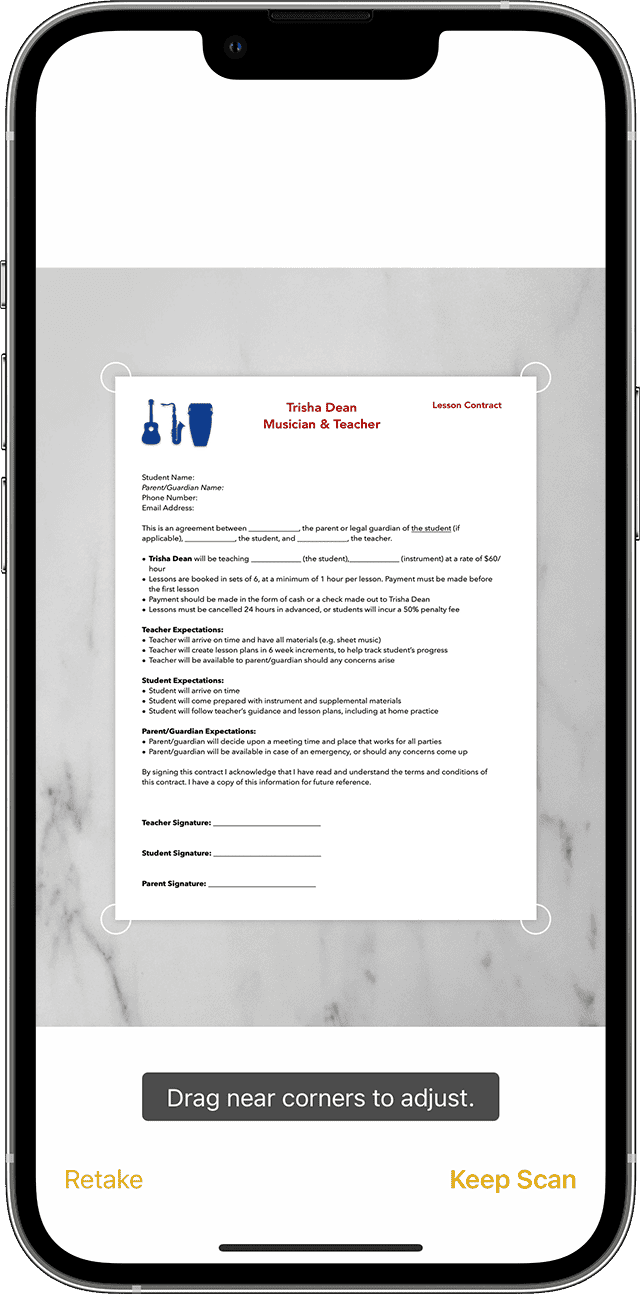
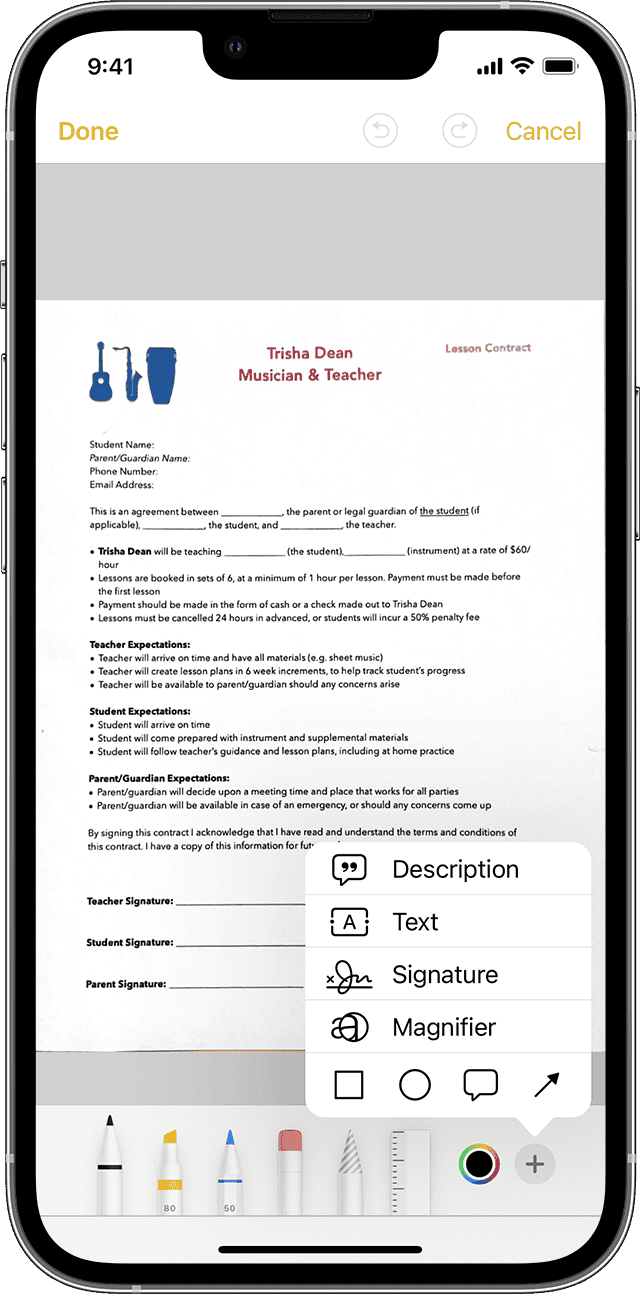
To scan a document, open the Notes app on your iPhone and create a new note. Tap the camera icon above the keyboard and select ‘Scan Documents’. Place your document in view of the camera. For the best results, ensure good lighting. If your iPhone is set to Auto, it will scan the document automatically. If you prefer to do it manually, tap the shutter button or a volume button. After scanning, you can drag the corners to adjust and crop the scan. Using the Markup tool, you can then sign, add text, and draw on your scanned document as needed.
Once you finish scanning and editing, it’s time to save your document. Tap ‘Keep Scan’, then ‘Save’ to store the document in the Notes app. For storing multiple pages, keep scanning before you save. To share your scans, tap the Share button and choose how you want to send your document — through email or text, for instance. Save your scanned documents as PDF files in the Files app or upload them directly to iCloud Drive for secure storage and easy access across devices.
Your iPhone’s scanner is more than a simple tool; it is a powerful feature that enhances your productivity. Use Continuity Camera to scan documents directly into your Mac, where editing and sharing options expand. Explore technology that lets you extract text from scans, search through PDFs, and share files quickly with contacts. By mastering these advanced features, you can turn your iPhone into a versatile scanning device that fits in with your workflow seamlessly.